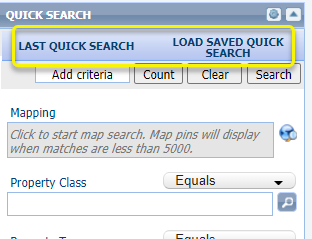
Quick Search is located on the home page of Paragon providing the ability to run a basic search immediately upon logging into the system. Although intended for less comprehensive searches than full search, it is a handy tool that is customizable to better meet your needs. Watch the video below to learn more or follow the instructions.
JUMP TO A SECTION:
How to Add/Remove/Rearrange Fields on the Quick Search
How to Save the Quick Search with Data
How to Access Secondary Quick Searches
How to Add/Remove/Rearrange Fields on the Quick Search
Step 1: Go to the Paragon Home page
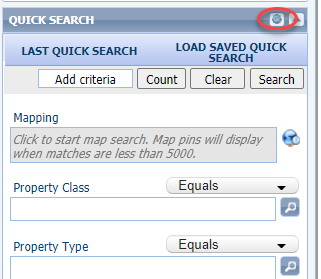
Click the gear icon in the top, right corner of the Quick Search
Step 2: Adding Fields
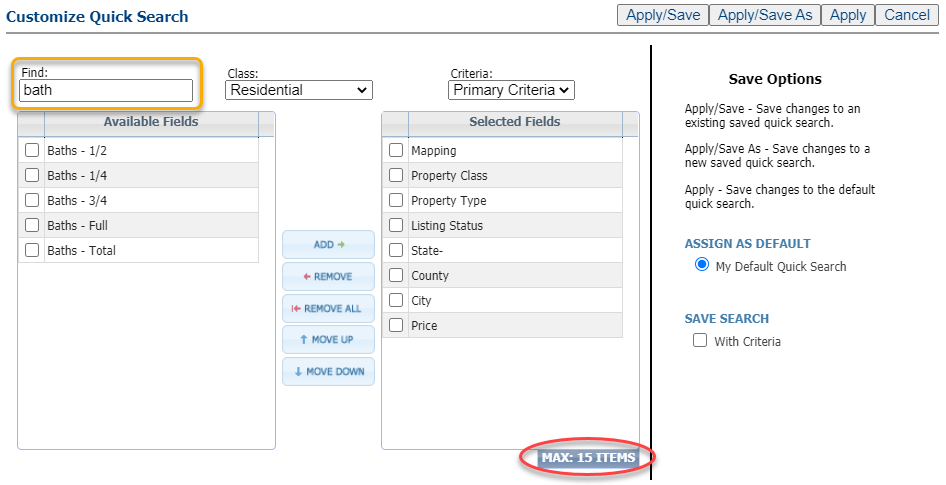
- In the pop-up modal, "Available Fields" are the fields that can be added while "Selected Fields" are fields already included.
- Add fields by scrolling through the list or using the "Find" box to filter through the list by typing the field. Note you are limited to a maximum of 15 fields on the Quick Search.
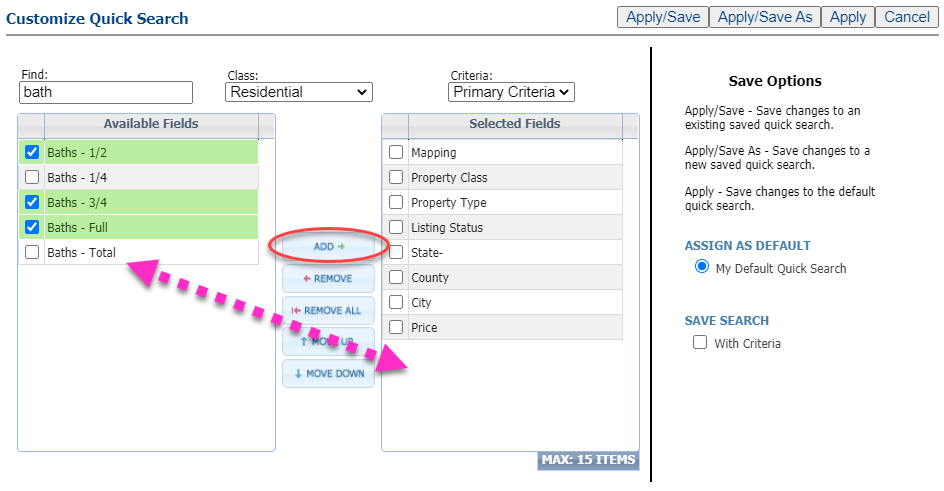
- Double-click on a single field or select multiple fields using the checkboxes and clicking "Add." Both options will add the field(s) to the "Selected" side.
Note: The "Class" drop-down is set to Residential. By default, the Quick Search is a multi-class search, but this drop-down dictates the fields you will see as available. If you work primarily in a different class and wish to add fields specific to that class, select it from the drop-down menu. The list of "Available Fields" will update accordingly.
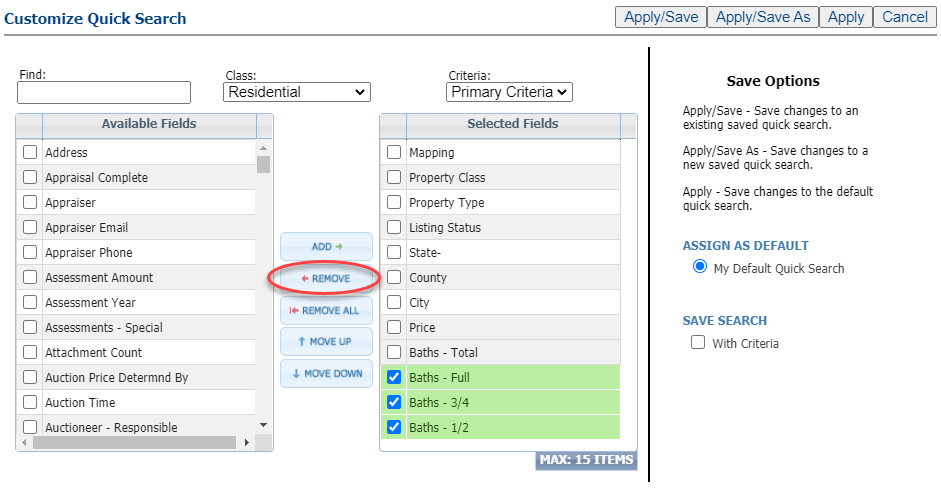
Step 3: Removing Fields
- If you wish to remove fields, double-click the field from the "Selected Fields" list. You may also select multiple fields using the checkboxes and click "Remove." Removed fields are added back to the "Available Fields" list for future use, if needed.
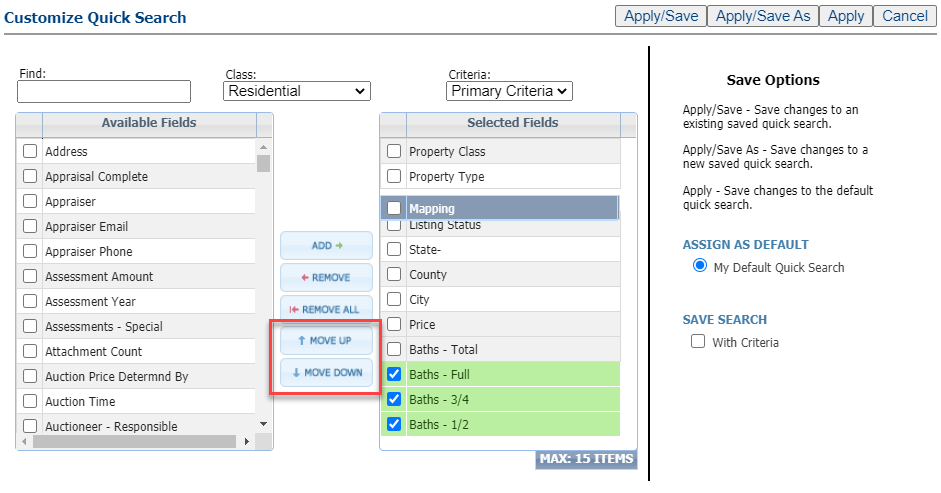
Step 4: Rearranging Fields
- Fields can be rearranged to an order that works best for you on the "Selected" side. Drag and drop individual fields or use the checkboxes to select multiple fields and click the "Move Up" or "Move Down" buttons to arrange.
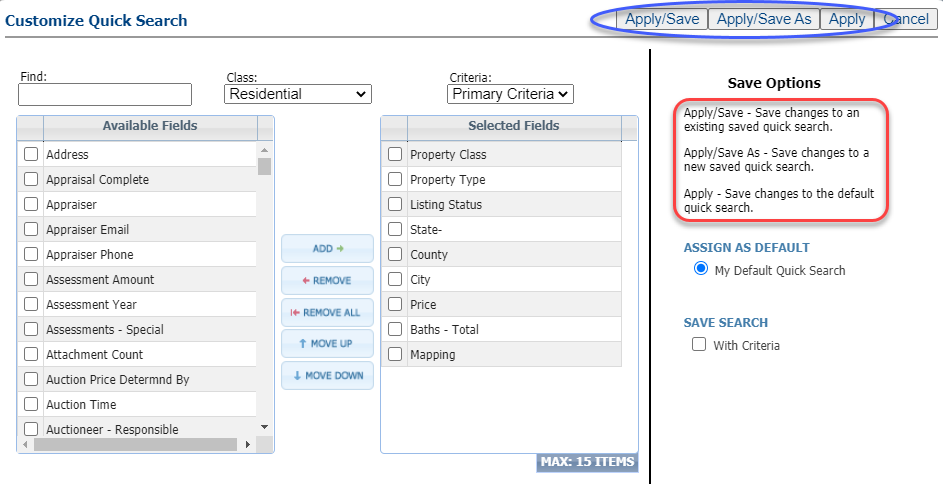
Step 5: Save
- There are 3 save options. Choose the option that suits your needs and click the button in the top, right corner of the modal.
- Apply: saves changes to the default Quick Search. Default will be the Quick Search that displays whenever you access the Home page. This should be the Quick Search you plan to use most often.
- Apply/Save As: saves the changes you've made and provides the ability to name the Quick Search. This will create secondary quick searches for utilization as needed. Accessing saved Quick Searches is by clicking the "Load Saved Quick Search" button.
Tip: What is the difference between Save As and Save? Think of it as like a Word document. Whenever you save a document in Word, you click "Save As" and then as changes are made to that document, you click "Save." This same idea applies to saving searches in Paragon. Use "Save As" whenever you wish to save a new search. Use "Save" whenever you wish to save changes you've made to a current search.
How to Save the Quick Search with Data
Another way to customize the Quick Search is to save it with data. This will help to make running a search even quicker!
Step 1: Add criteria
- On the Quick Search, add any criteria that typically stays the same when you use the template.
Tip: Do you search only some of the classes offered for search? In Property Class, enter those classes. PrimeMLS is a multi-state MLS, so in the State field, enter the state(s) you search most often so you never have to worry about entering that information each time!
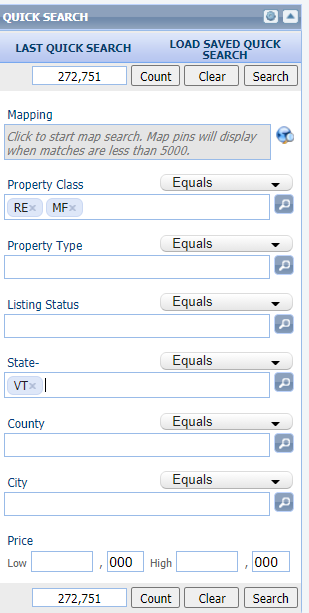
Step 2: Save
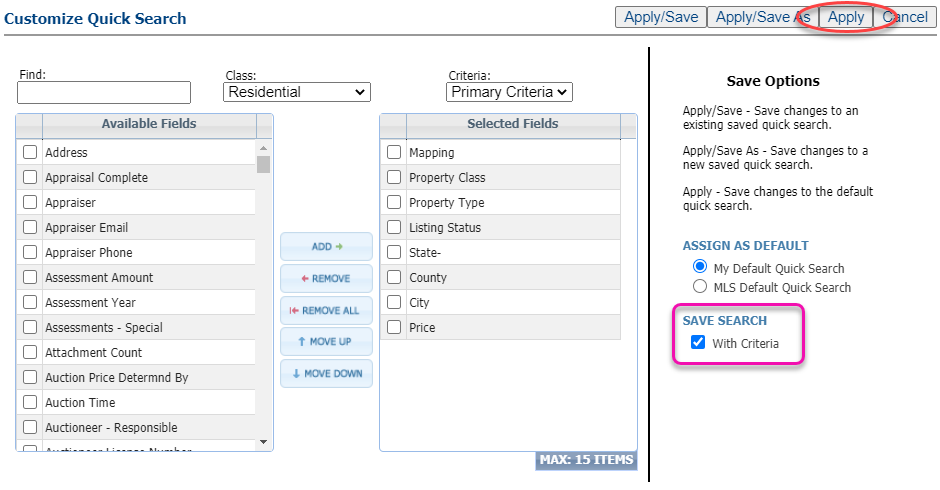
- Once all the criteria you wish to save has been entered, go to the gear icon in the top, right corner of the Quick Search.
- In the pop-up modal, check the "Save Search with Criteria" checkbox, then click "Apply."
Step 3: Using the Quick Search
- The data you need will always be there, ready for use.
- You can add to the template and run your search.
- If your saved data does not apply to a particular search, you can clear it out and enter the applicable data. Then, when you log out of Paragon and return later, or if you refresh the Home page, your saved data will automatically return.
How to Access Secondary Quick Searches
Access additional Quick Searches you have saved by clicking the "Load Saved Quick Searches" button. Additionally, previous quick searches that you've run (a running list of 15) is available by clicking "Last Quick Search."