
The Collaboration Center for buyers is a portal to review listings they are receiving from the system. They can favorite listings, mark others as possible or reject listings. They can add comments and requests showings, which go directly to their agent. They can compare listings and more. All of this can be done on any device, as the portal is entirely mobile friendly. In most cases, hopefully you'll be able to "let the system do the work," but for more particular buyers, you can set them up with Agent Preview. This means you'll receive the matches first to approve or disapprove each before it goes to the client. This page covers how to set up a contact with the Collaboration Center under Agent Preview.
JUMP TO A SECTION
Setting Up A Buyer with Agent Preview for the Collaboration Center
How to Review and Approve New Matches for Collab Center
Setting Up A Buyer with Agent Preview for the Collaboration Center
Step 1: Add Contact
Go to the "Contacts" menu and select "Add Contact."
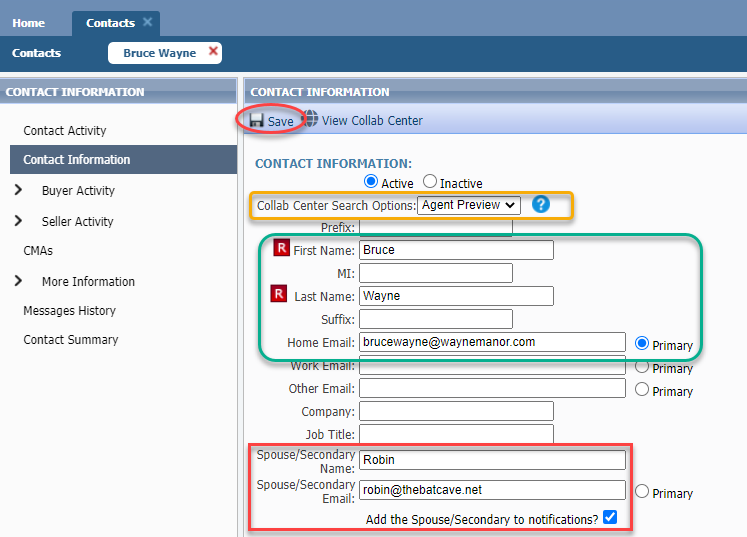
Enter at least their First Name, Last Name, and 1 email address as that is required to save a contact with the Collab Center.
1 email address must be set as the primary, as that is the one that will receive notifications
If another person should also receive notifications, enter their name and email address into the "Spouse/Secondary" name and email fields. Be sure to check the "Add Spouse/Secondary to notifications" box.
Under "Collab Center Search Options" choose "Agent Preview."
Click "Save."
Step 2: Add Search
The screen will refresh.
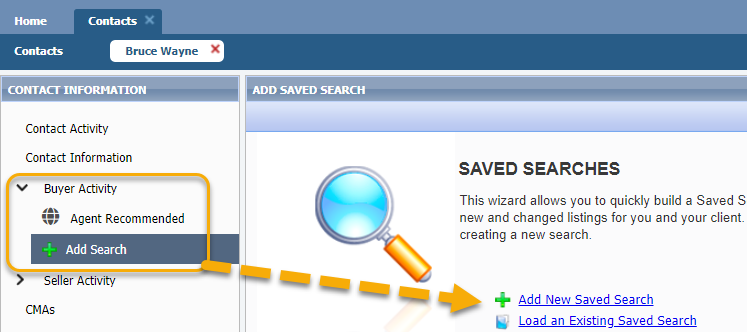
In the menu on the left, open "Buyer Activity."
Click "Add Search."
Choose "Add New Saved Search."
Choose the Class.
A search template will open. Enter the search criteria for the buyer.
Step 3: Save Search
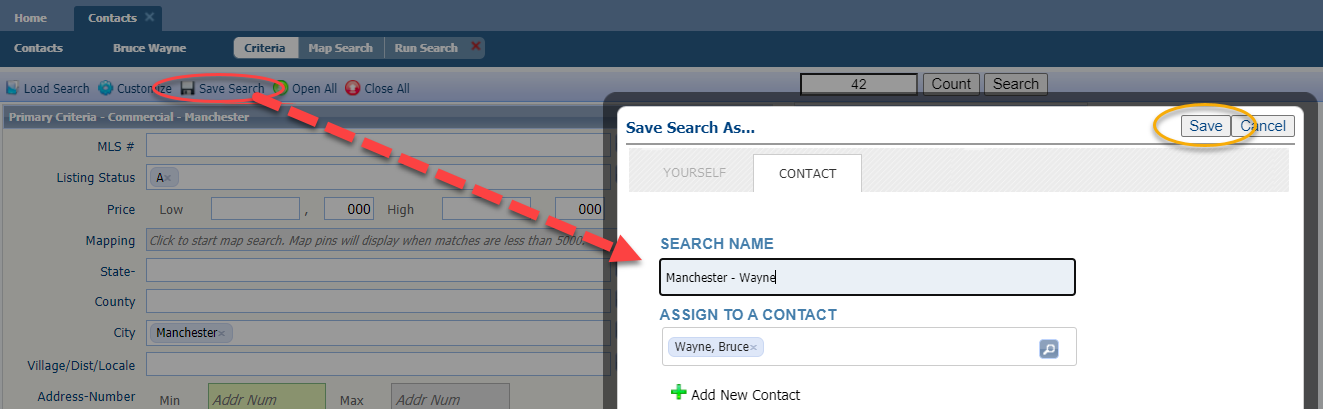
Once all criteria is entered, click "Save Search."
Choose "Save Search As."
Notice "Contact" is already selected and who you're saving it to is already entered.
Clear out the name of the search and enter something more specific. Note: the Buyer will see the name of the search, so make sure it is something that will make sense to them.
Click "Save."
Step 4: Email Settings
You'll be navigated back to your contact's profile.
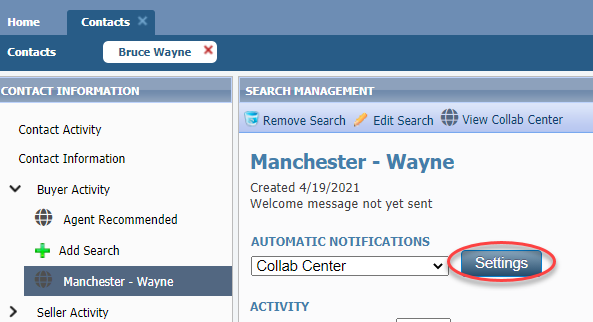
Notice under "Buyer Activity" is the search you just saved. It is selected and notice that "Collab Center" is selected.
Click "Settings" to customize when they'll receive an email and more.
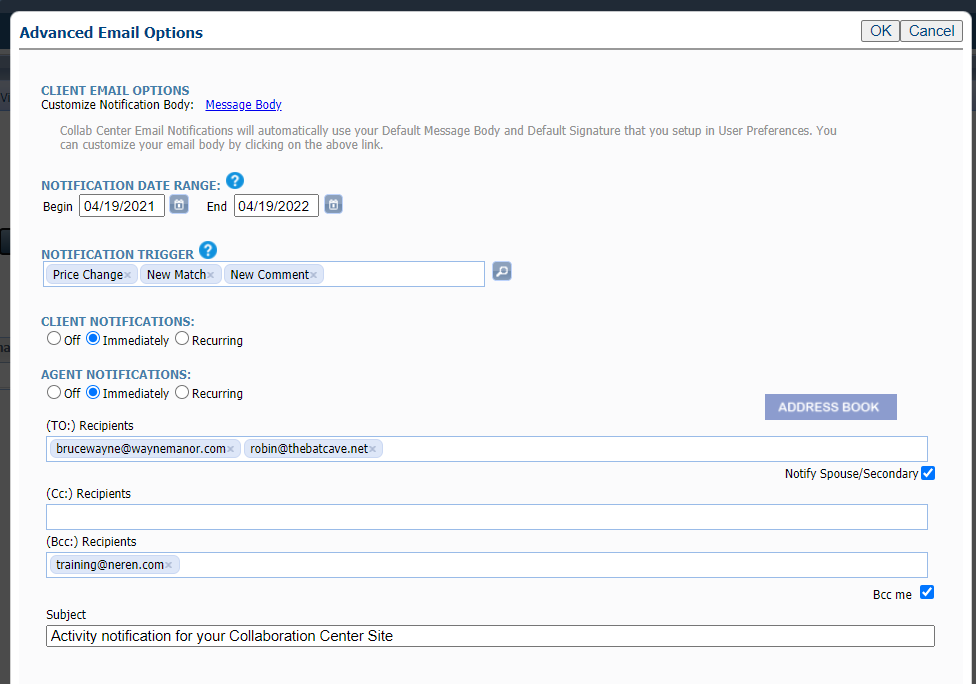
Step 5: Customize Email
Under Notification Date Range, they will be set to receive updates for a year (or until you inactivate them). Once this comes up for expiration, you'll be notified on the Home page to extend this or deactivate it. You can shorten the timeframe here, if you wish.
In Notification Trigger, notice they are set to be emailed about new listings, price changes and new comments. New comments means that if you add or respond to a comment in the Collab Center, the buyer will be notified. Click the magnifying glass to add more notification options, such as status changes and open houses.
In Client Notifications, they are set to receive updates "immediately," which is every 15 minutes if there are changes. This can mean multiple emails a day, which may be appropriate; however, if the client feels overwhelmed, you can change this. Click "Recurring" where the default is daily at 6:00 AM. This can be customized to a different time or time frame.
In Agent Notifications, you'll have the same time frame options, but this is for notifications you'll receive about what your buyers are doing in the Collab Center. Tip: Get these once per day, otherwise you may feel like you're getting too many emails from Paragon.
In the "To" box is the primary and secondary. Additional email addresses can be set here.
If your email address is also in the BCC field, this means you'll receive a copy of every email your buyer receives. It is suggested that you choose whether or not you want to be blind copied on what the buyer receives OR if you want the agent notifications. A good way to figure this out is for your first contact to be yourself! It's a great practice run and you'll be able to get both emails and learn which ones benefit you most.
Click "OK" to save changes.
Step 6: Review and Approve Matches
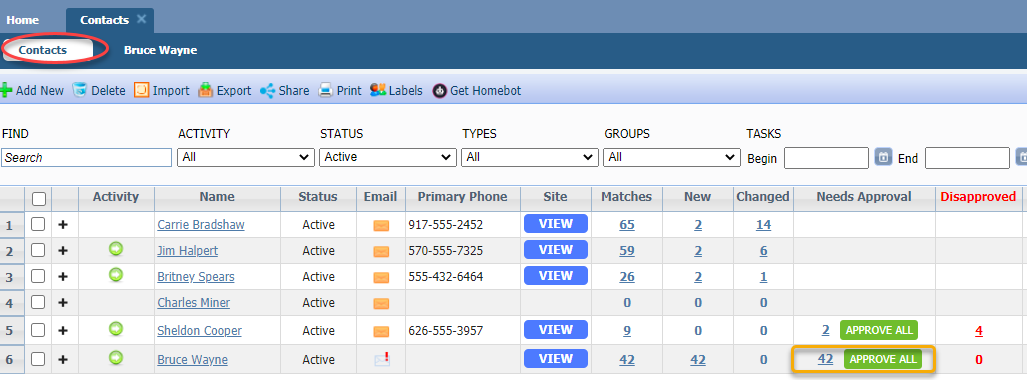
- Click the sub-tab at the top that says "Contacts."
- The new contact you've added will be included in your list.
- Click the number within the "Needs Approval" column. This is the list of current matches that need approval.
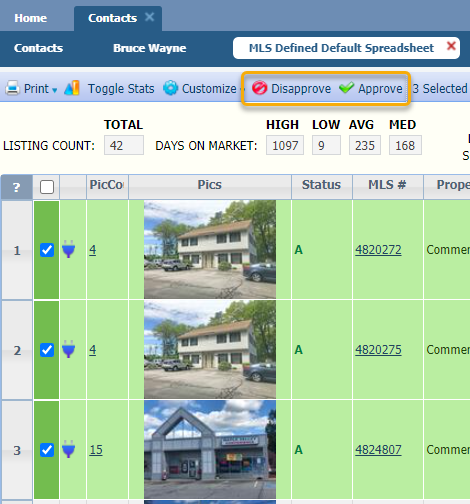
This navigates to a spreadsheet for you to review the listing details. Check the listings you wish to approve and click "Approve." Those will be emailed and added to the Collab Center. Click "Disapprove" on what does not work. This will be added to the "Disapproved" column.
Step 7: Send Welcome Email
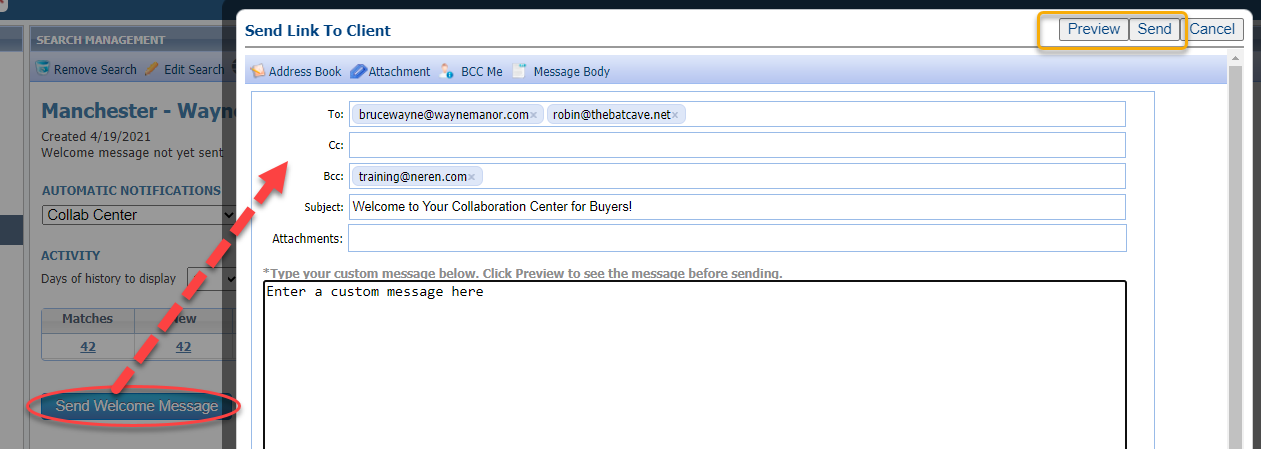
Once you have completed approving listings, click the sub-tab with the Buyer's name to return to their profile.
Click "Send Welcome Message." This is your one manual email that also provides instant access into the Collab Center.
Click "Preview" to review what the email actually looks like.
In the email body, enter a custom message if you wish.
Click "Send."
Moving forward, every email will be sent on an automatic basis upon your approval of new matches.
How to Review and Approve New Matches for Collab Center
If you have a buyer set up with Agent Preview for the Collaboration Center, you'll receive notifications first letting you know that there are new matches. In order for the buyer to see the matches, you must first approve each.
Step 1: Find Contact
- Go to the "Contacts" menu.
- Select "View/Manage Contacts."
- Find the contact in your list for which listings must be approved.
Step 2: Approve or Disapprove
- In the Approved column, click the number.
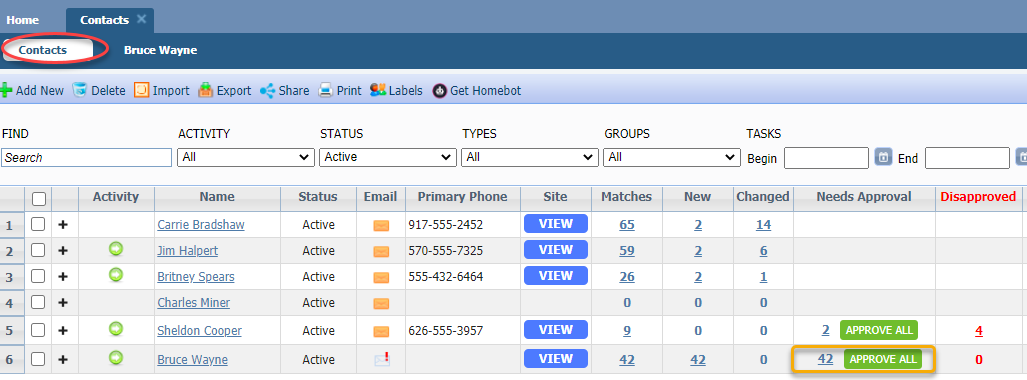
- This navigates to a spreadsheet for you to review listing details.
- For all that you wish for them to see, check the box on the left and click "Approve." The buyer will be emailed based on the schedule you've set for them to receive update notifications.
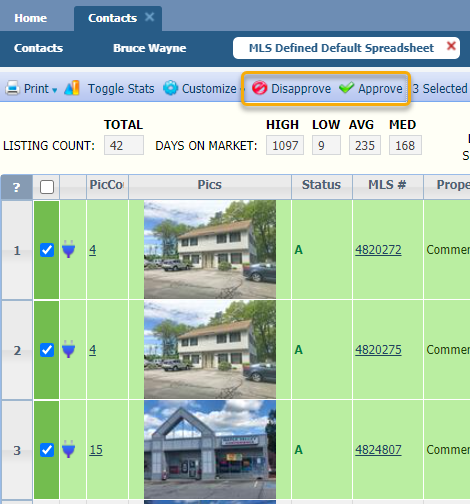
- For all that you wish for them not to see, check the box on the left and click "Disapprove." This listings are not added to the Collab Center, but you can review them under the "Disapproved" column where listings can be approved, if you wish.