Every search class in Paragon has a default template with set fields. Agents can create unlimited custom searches by adding, removing and rearranging fields. Those templates can then be saved for their own use or for a contact. These instructions cover how to create a customized search template and save it for agent use. Refer to the Create a Contact page for instructions on saving searches for contacts.
Customizing, Saving & Accessing Searches
Customizing & Saving a Search
Step 1: Open a search
Go to the Search menu
Choose a class
Step 2: Add Containers
Containers help to organize your search template. By default, there are 2 containers on your search template: primary criteria and dates criteria. This is not required for customizing, but a great option if you like fields that work together to be contained in the same section.
When the search template opens, click "Customize" from the toolbar and choose "Containers."
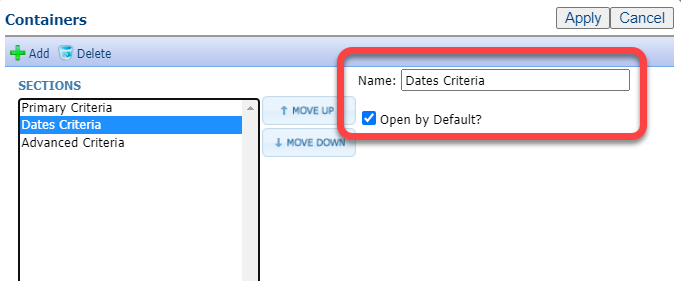
In the pop-up, you'll see 3 containers: Primary, Dates, and Advanced. The Advanced container is not on your search template. This is because you can add as many containers as you want, but containers will not be shown on the template unless there are fields inside of them.
Click the name of a container and that will give you the option to change the name of a container and choose for it to be "open by default." This means that the container will be open and showing the fields in it. Otherwise, you'll have to click the blue bar to open the container on the search template.
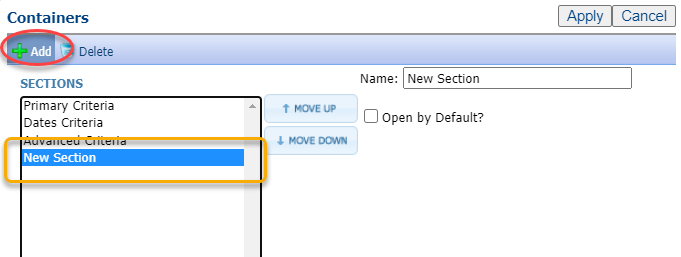
Click "Add" and you'll see "New Section" is added.
Click "New Section" to rename it and choose for it to be open by default.
Each container can be selected and rearranged, as well.
- Click "Apply." The pop-up will close and your template will refresh; however, no changes will be reflected regarding new containers because there are not yet any fields added.
Step 3: Customize the Search Template
- Click "Customize" from the toolbar and choose "Fields."
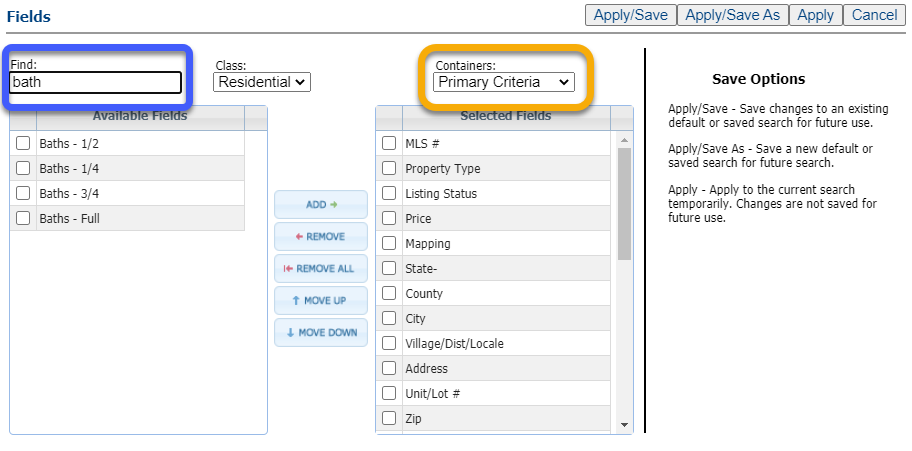
- In the pop-up, you'll see a list of Available Fields, which are all of the fields you can add, and Selected Fields, which are all the fields already included on the template.
Adding Fields
- As many fields as you need can be added. Use the filter at the top to find the field you need to add.
- Double-click the field or select multiple fields and click "Add." Both options add the field to the Selected side.
- This is adding fields to the "Primary" container. If you want to change the container, click "Containers" and select the container to add fields.
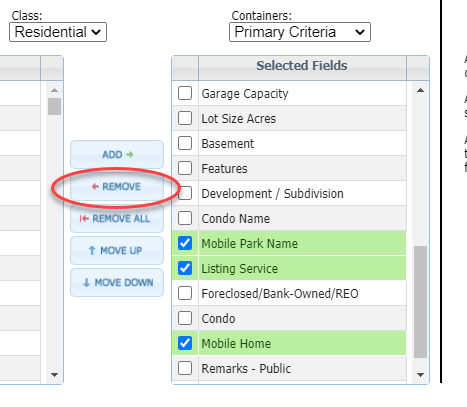
Removing Fields
- Remove any fields you don't want or need from Selected side.
- Double-click the field or check multiple fields and click "Remove."
- You can update the Container, as well, to remove fields from different containers by choosing the applicable one from the "Containers" drop-down.
Rearranging Fields
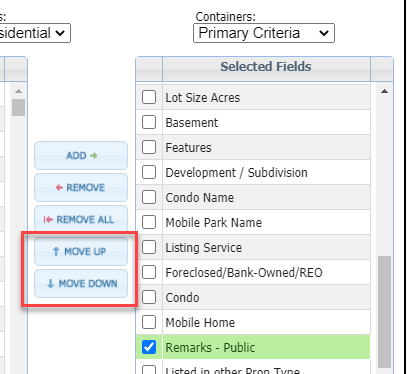
- Drag and drop a single field up or down or select multiple fields and use the "Move Up" or "Move Down" fields.
Step 4: Saving Search Templates
Option 1: Apply
Clicking "Apply" will apply the changes you've made to the template, but it does not save your search.
This is a great option if you need to quickly add a field, run the search, get the results and go.
Option 2: Apply/Save As
Clicking "Apply/Save As" will apply the changes you've made to the template and provide a pop-up to save your search.
Use this option the first time you save a search - think of it as similar to a Word document. The first time you save a document in Word, you choose "Save As."
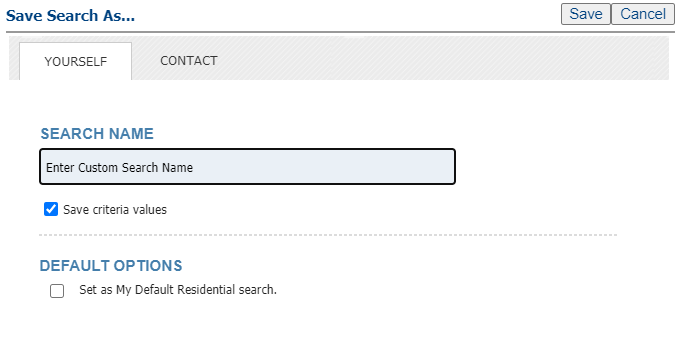
In the pop-up that appears after clicking "Apply/Save As" it will be defaulted to save for your own use.
Name the search
"Save Criteria Values" will be checked by default. If you had entered any criteria on the search template, leaving this checked means that not only will the field customizations save but any criteria you had entered will load, as well.
"Set as my default [Class] Search" will be unchecked by default. Checking this box means that instead of what PrimeMLS created as the default, you will have your own custom default.
Click "Save."
Option 3: Apply/Save
Clicking "Apply/Save" will apply the changes you've made to the template and provide a pop-up to save your search.
Use this option as you make changes to an already saved search - think of it as similar to a Word document. The first time you save a document in Word, you choose "Save As" and as you make changes to it, you choose "Save."
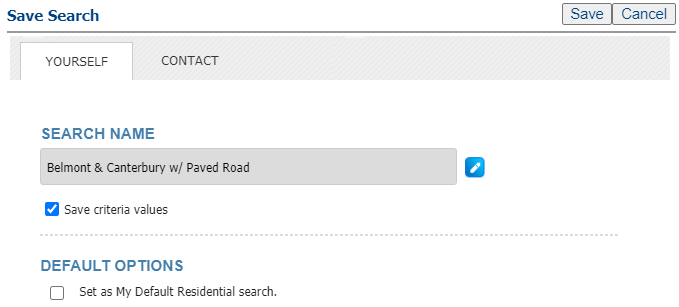
Notice that when you choose "Save" you don't have to change the name, but you can with the pencil icon.
Simply choose if it's going to be saved with criteria and if it's your default or not.
Click "Save."
Accessing Saved Searches
Option 1: From the Template
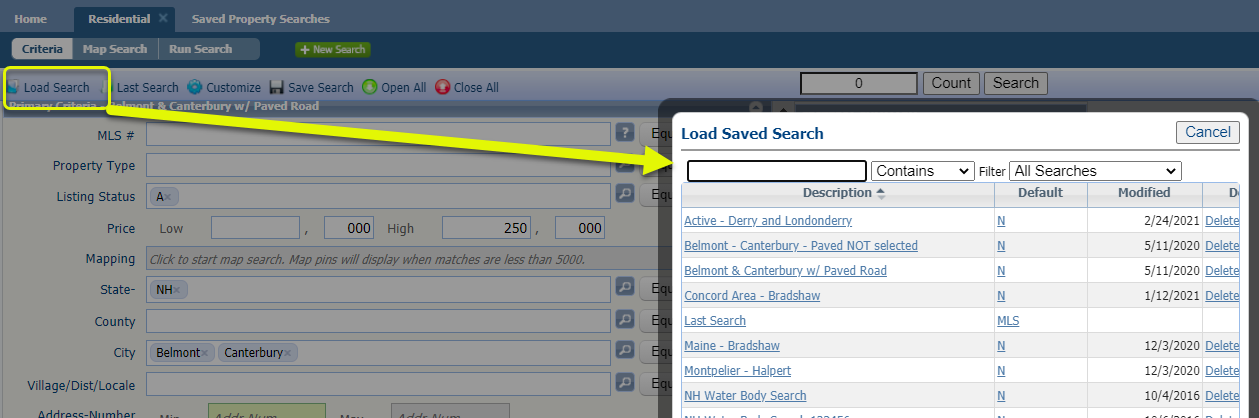
To access your saved searches, open a search template and click "Load Search" from the toolbar.
Choose "Load Saved Search."
This will open all of the saved searches you have for that class.
Click the name of the search to open the template.
Open 2: From the Search Menu
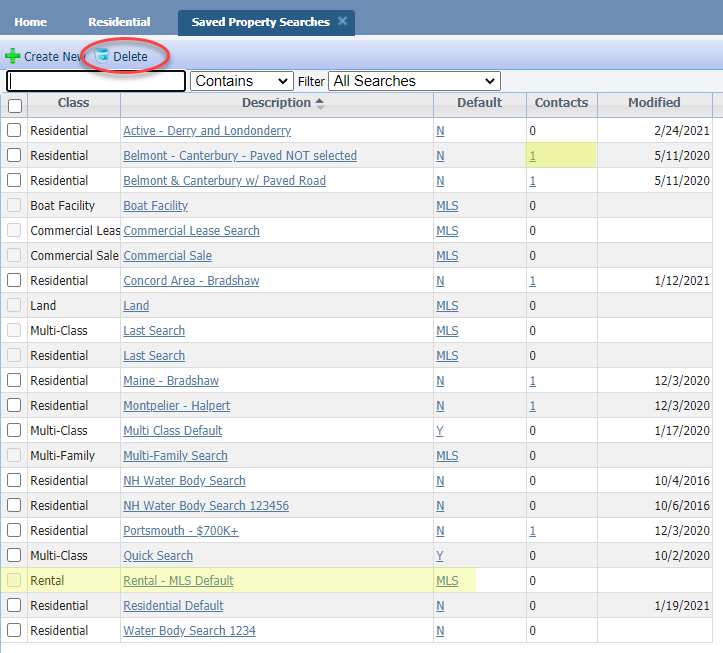
Saved searches can also be accessed by clicking "Search" and choosing "Saved Property Searches."
This shows you all saved searches you have across all classes.
Click the name to open the template.
This is also an easy way to delete multiple searches by checking what you no longer need and clicking "Delete."
Notice if a search is saved to a contact, so you don't accidentally delete a contact's search.
Also notice that some saved searches cannot be deleted; these are MLS default templates.